


- Webflow code export
- Webflow's code export writes your site's HTML, CSS, and JS out as files. It requires the paid Workspace plan (Core or above), and the export itself takes 3 clicks.
Hi, I'm Masato, a Webflow specialist. This article answers:
"I want to keep my Webflow-built site running cheaply. I want the site and domain to survive canceling Webflow. And I want to know what to edit in the exported code."
✓ What you'll learn
- How to migrate from Webflow to your own server
- A cheap, time-saving hosting setup
- How to work with Webflow's exported code
I run a Webflow business with 50+ companies supported, and I've exported code and published sites myself. No technical expertise required — this is written for no-code-only readers.
What migration requires
- Code export: needs a paid Workspace plan (Core or above; the original article was written when this tier was the $16/mo Freelancer plan)
- Export itself is 3 clicks
- CMS articles do not export with the code
- Forms stop working → substituting Google Forms is easiest
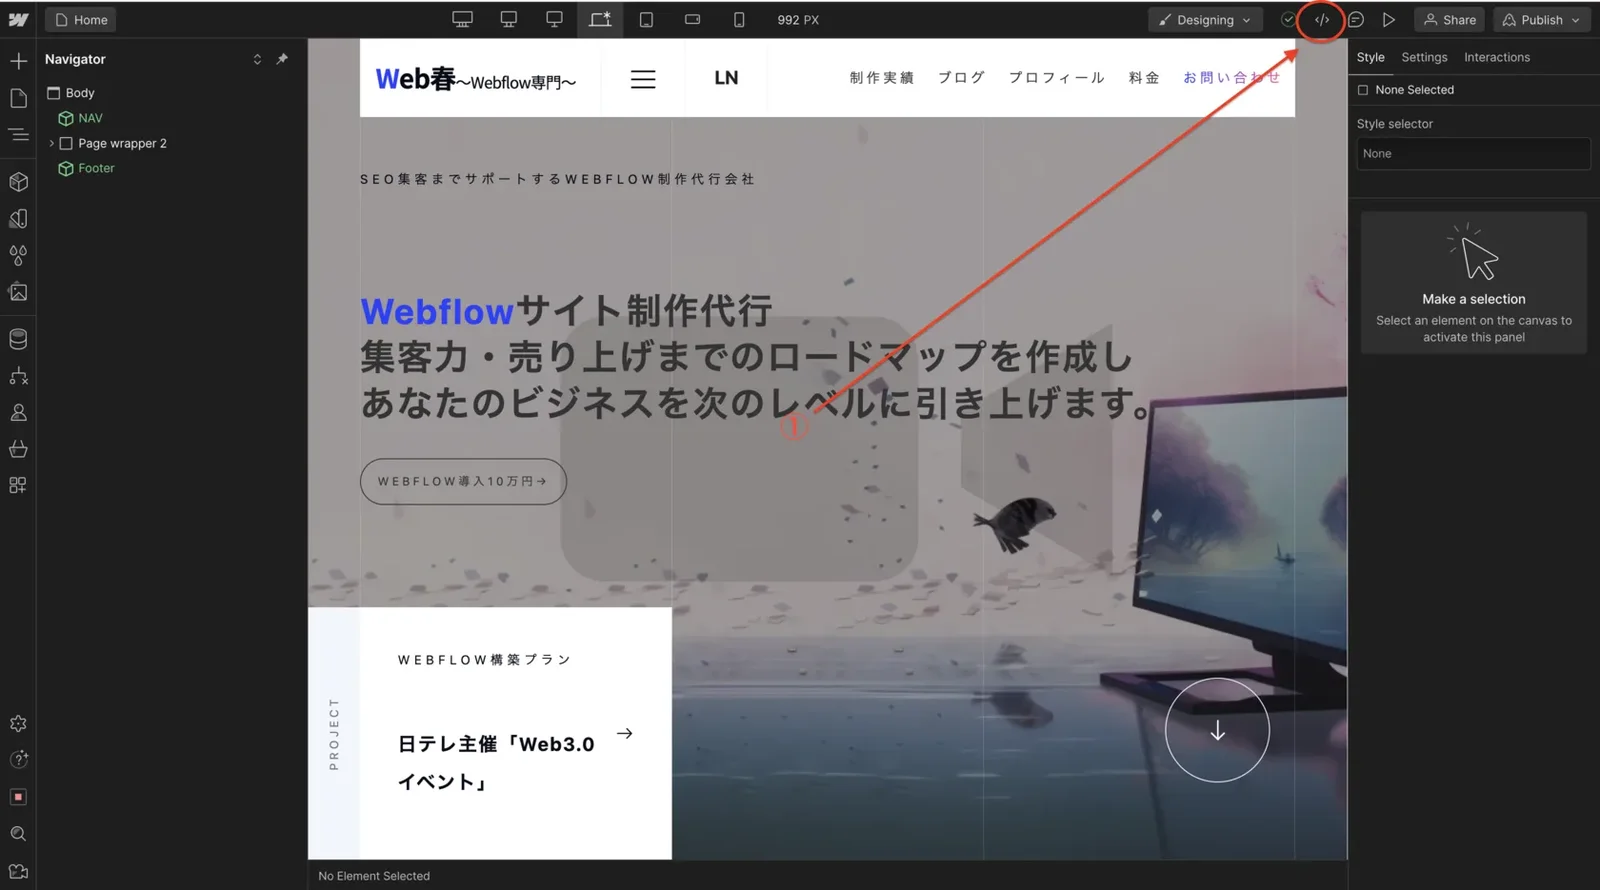
This walkthrough covers static pages only, no CMS. With a CMS involved, you'd be migrating to WordPress — different work entirely. Ask in the community if you want that covered.
Choosing a server
The original uses Lolipop, a budget Japanese shared host, chosen because:
- Very cheap (about ¥5,000/year, ¥7,000 for 3 years)
- Long-established and well known
Publishing on Webflow without a CMS runs $14/month (about ¥2,100) — and I wanted to shave even ¥100 off the running cost. The same logic applies anywhere: pick any budget shared host in your market; the procedure below is identical. Here is the referral link if you want the one I used: 10-day free trial.
The migration, step by step
About 5 minutes of work:
- Sign up for hosting
- Register your domain in the host's control panel
- Name the publish (upload) folder after your domain
- Open the host's FTP
- Upload Webflow's exported files
- Point the www subdomain at the same publish folder
- Switch the domain's nameservers
- Click the SSL setting
- Done — wait about a day, then verify
Sign up for hosting
Start cheap and upgrade when pageviews grow — that's all the strategy you need.
Choosing a domain
Domains have no bearing on SEO, but the good ones are short and legible — "mblog.com" for a personal blog, "recruit.co.jp" for a company. Short domains tell users what the site is at a glance.
Endings go through fashions. In no-code circles .io is everywhere; around November 2023, .ing launched and drew attention — code.ing, eat.ing and the like are popular for being memorable. Watching what is in vogue is half the fun.
Mine, for the record, is "non-haru.com" — the names of cats I used to keep, strung together. Slightly longer than ideal, but attachment counts for something.
Some things not to do when choosing a domain:
- Including another company's name
- Names that get you banned on social platforms (slurs and the like)
Register the domain in the control panel
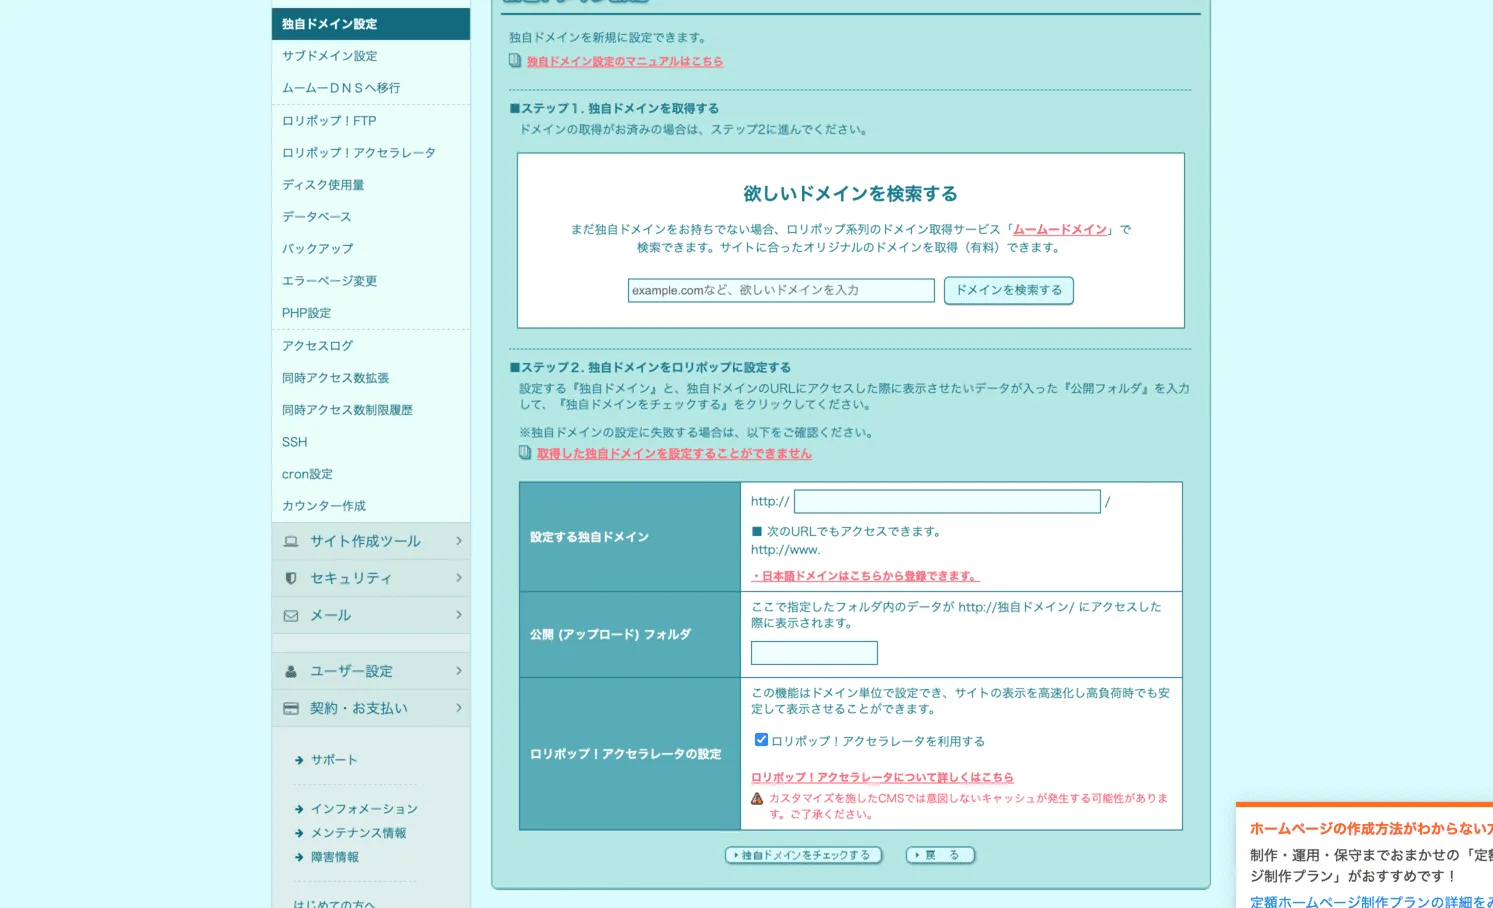
- Custom domain: the domain you bought
- Publish (upload) folder: the same name as the domain
- Accelerator setting: ON (either is fine)
Understanding the publish folder
This tripped me up, so here's my mental model:
- Your files → Server A (upload) → Server B (serving) → what users see
The "publish folder" selects the folder whose HTML gets served (Server B). First, though, you upload to Server A.
Upload via FTP
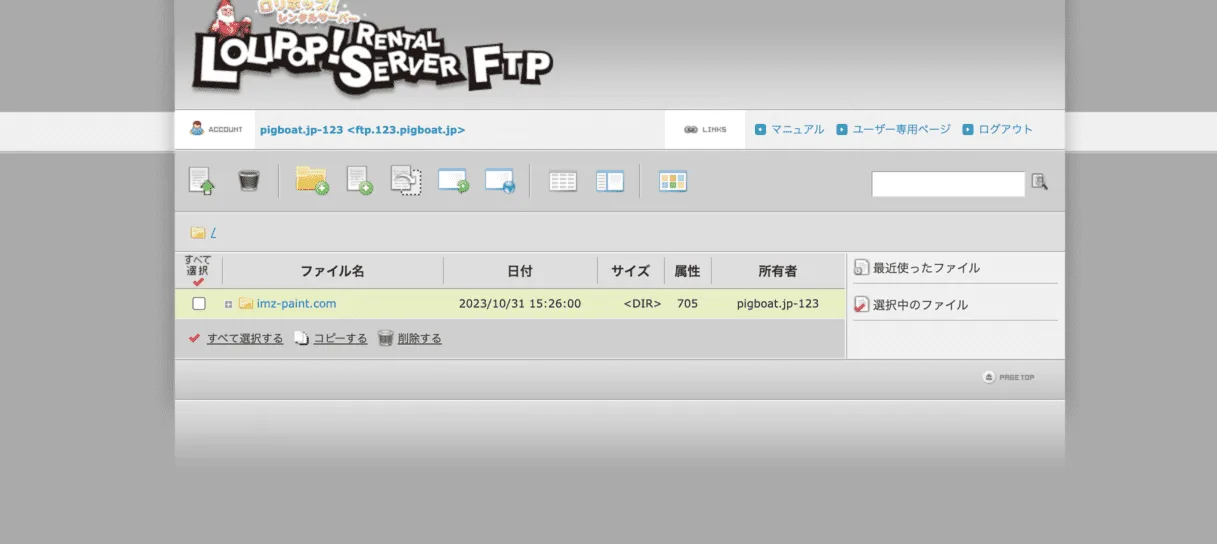
The host's web FTP shows a folder auto-created with your publish-folder name. Put Webflow's exported code inside it and the site can go live.
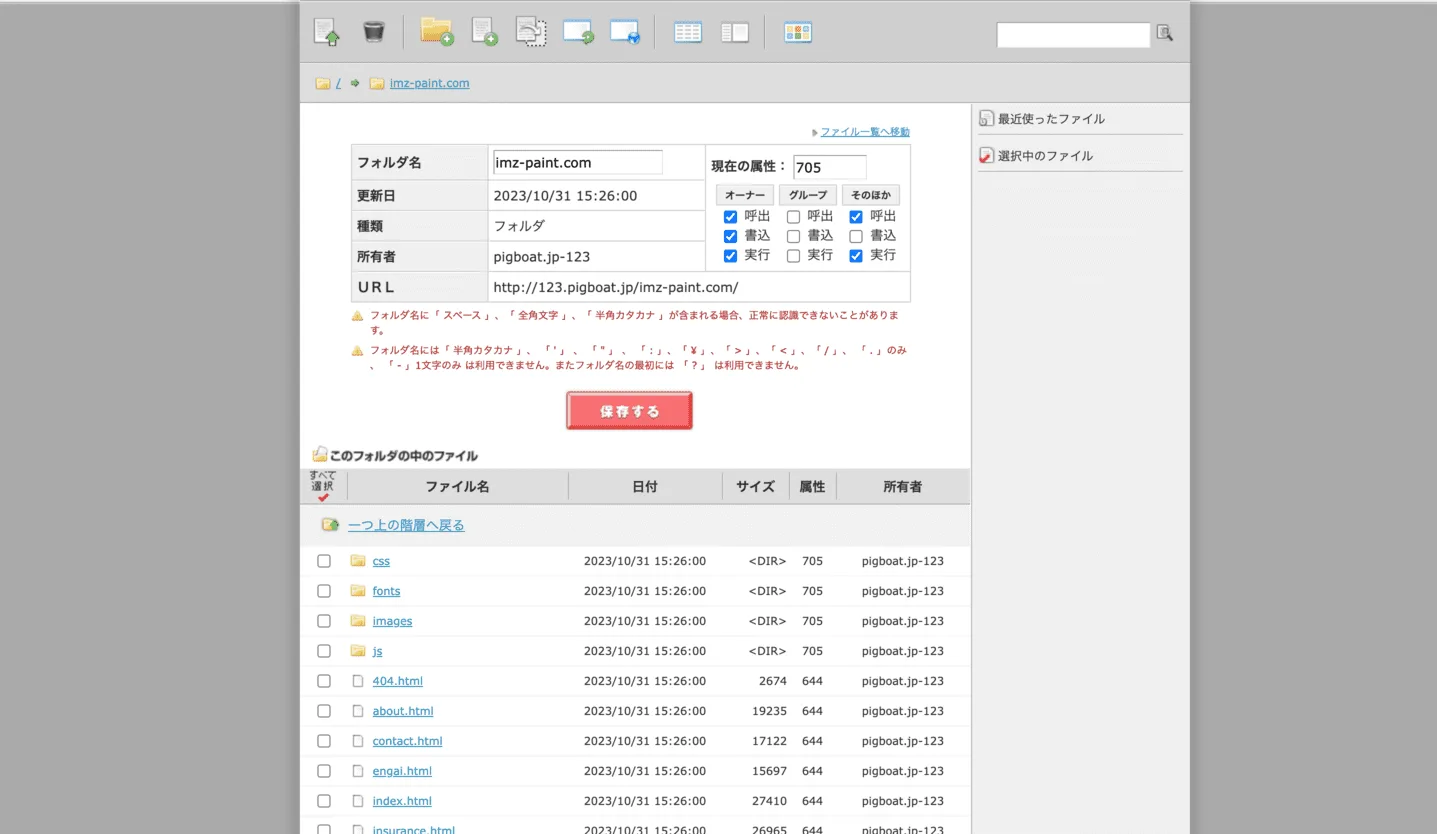
Unzip Webflow's export and upload everything: HTML as-is, and recreate the CSS and other folders at the same hierarchy. Mirror the export's structure and it works.
Point www at the publish folder
If you published on www with Webflow, configure www on the host too — enter the same publish-folder name you just created.
Switch the nameservers
Point the domain at your host's nameservers. For Lolipop these are uns01.lolipop.jp (primary) and uns02.lolipop.jp (secondary); every host publishes its own pair.
At your domain registrar, remove the DNS records set for Webflow and switch to the host's nameservers:
- Delete the default nameservers
- Open custom nameservers and click "switch settings"
- Enter the host's primary and secondary nameservers
Click the SSL setting
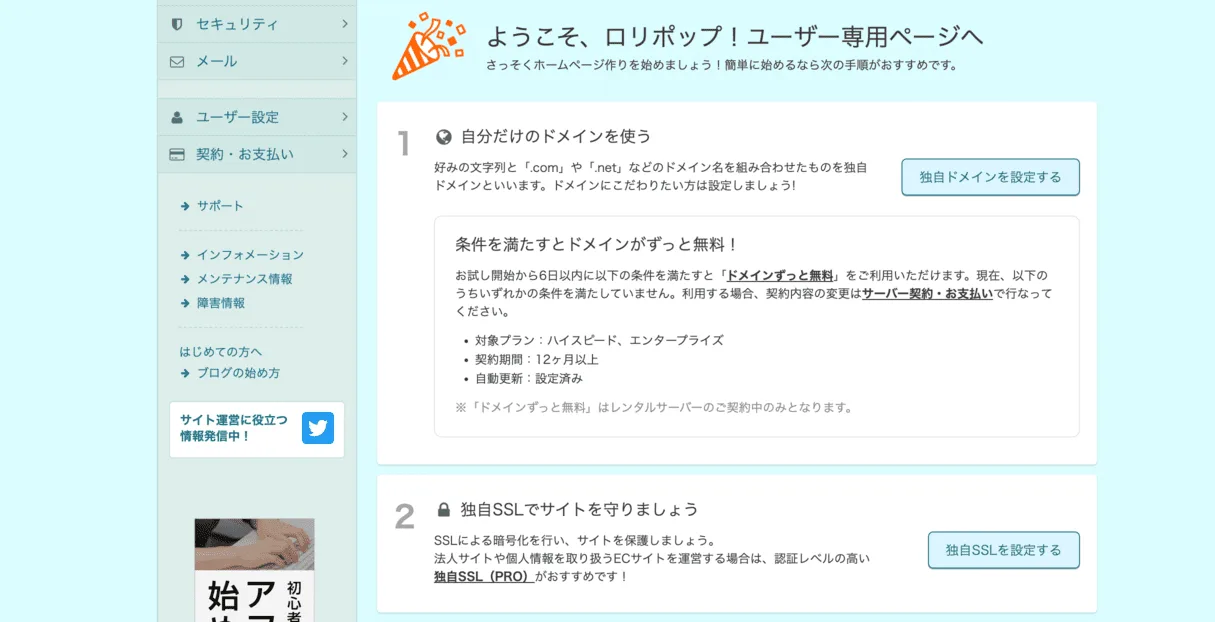
Back at the main screen, go to SSL and click free SSL. That's it.
Done — wait a day, then verify
Usually changes apply immediately, but SSL and www can lag. Give it about a day. I checked immediately, saw errors, went to bed — and woke up to a working site.
Editing Webflow's exported code
There's plenty you could change — image filenames, meta tags, HTML/CSS/JS names — but none of it is required for normal operation.
Delivering code to a client? Tell them it came from Webflow. Presented well, that earns more respect than ordinary hand-coding — and opens the door to proposing Webflow-based management too.
If you still want to scrub it:
- Rename classes: Webflow generates classes with its own naming conventions — plenty literally say "webflow"
- Remove telltale meta tags like name="generator"
- Consolidate stylesheets and rename obvious files like webflow.css
- Consolidate scripts and minimize direct references to Webflow libraries
- Remove Webflow branding elements
- Optimize the code: prune extras, customize structure
- Rename image files
- Use Google Tag Manager instead of direct tracking codes
- Forms: I substituted Google Forms
Frequently asked questions
What do I need to export code from Webflow?
The paid Workspace plan (Core or above). The export is 3 clicks — but CMS articles don't come along, and forms stop working, so Google Forms is the easy substitute.
What hosting should I migrate to?
The original uses a budget Japanese shared host (~¥5,000/year). The logic transfers anywhere: start with cheap shared hosting and upgrade when pageviews grow.
Can CMS-based sites migrate the same way?
This covers static-pages-only export. With a CMS involved you'd migrate to WordPress — different work.
What if the site doesn't show up right after migrating?
Most changes apply immediately, but SSL and www can take time. Wait about a day before verifying.