


- Web font
- A web font renders text crisply and identically on every device. Text remains searchable (good for SEO), and edits during updates stay simple.
This article answers a common question, covering:
- All 3 ways to add fonts to Webflow
- The single easiest method
- Recommended fonts worth adding
I build websites in Webflow for a living, earning around ¥300,000/month, and I've added fonts by every one of these methods myself.
Adding Google Fonts to Webflow (the easiest)
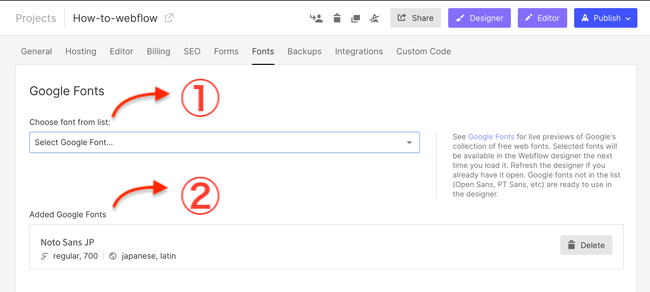
Just pick from a dropdown — the easiest way to add a font.
- ① Select the font to add
- ② The added font appears
Google Fonts are convenient web fonts — standards like Noto Sans add in seconds.
What's a web font?
Web font benefits
1. SEO-friendly (text is searchable)
2. Easy text edits during updates
3. Crisp letterforms on every device
4. Identical rendering on every device
5. Typographic differentiation
6. No separate text images for desktop and mobile
Rendering that shifts per device is a headache — web fonts are usually the best choice.
Adding Adobe Fonts to Webflow (3 steps)
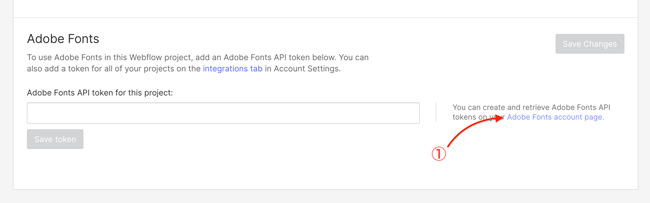
Using Adobe Fonts in Webflow takes three steps:
- [Step 1] Set the API token
- [Step 2] Choose the fonts
- [Step 3] Save in Webflow
About 5 minutes altogether.
Access to all Adobe Fonts requires a subscription, but some fonts are free — this walkthrough uses the free ones. (The method is identical on paid plans.)
[Step 1] Set the API token
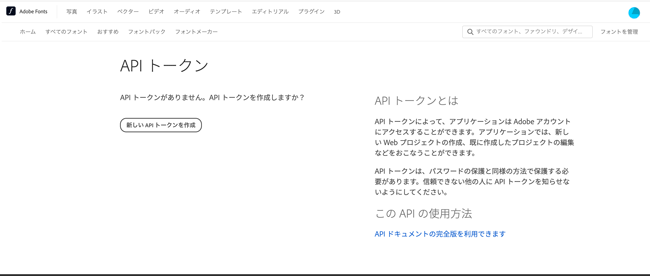
- ① Log into Adobe from the Adobe Fonts account page
- ② Open the API tokens page from your account at top right
- ③ Click "Create new API token"
- Paste it into Webflow's Adobe Fonts field
[Step 2] Choose the fonts
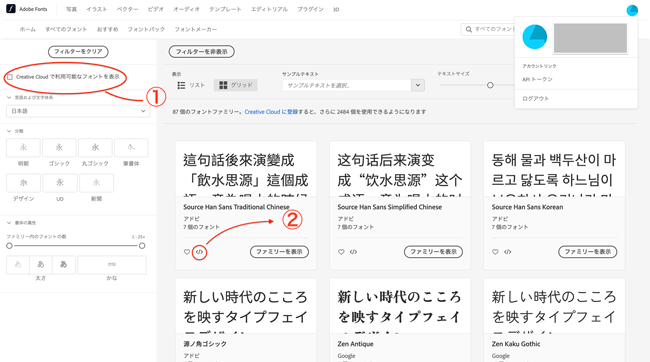
① Untick "Show fonts available in Creative Cloud" to see only free fonts.
② Fonts marked </> are usable — paid plans unlock more.
- Click
</> - Create and save a web project file
- Add every font you want to the same file
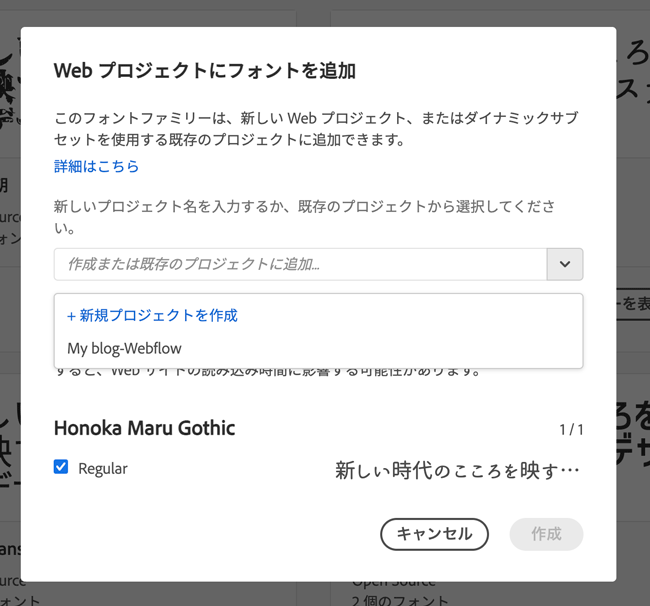
Adobe then tells you to copy code into your HTML head — Webflow is no-code, so ignore it and return to Webflow's font screen.
[Step 3] Save in Webflow
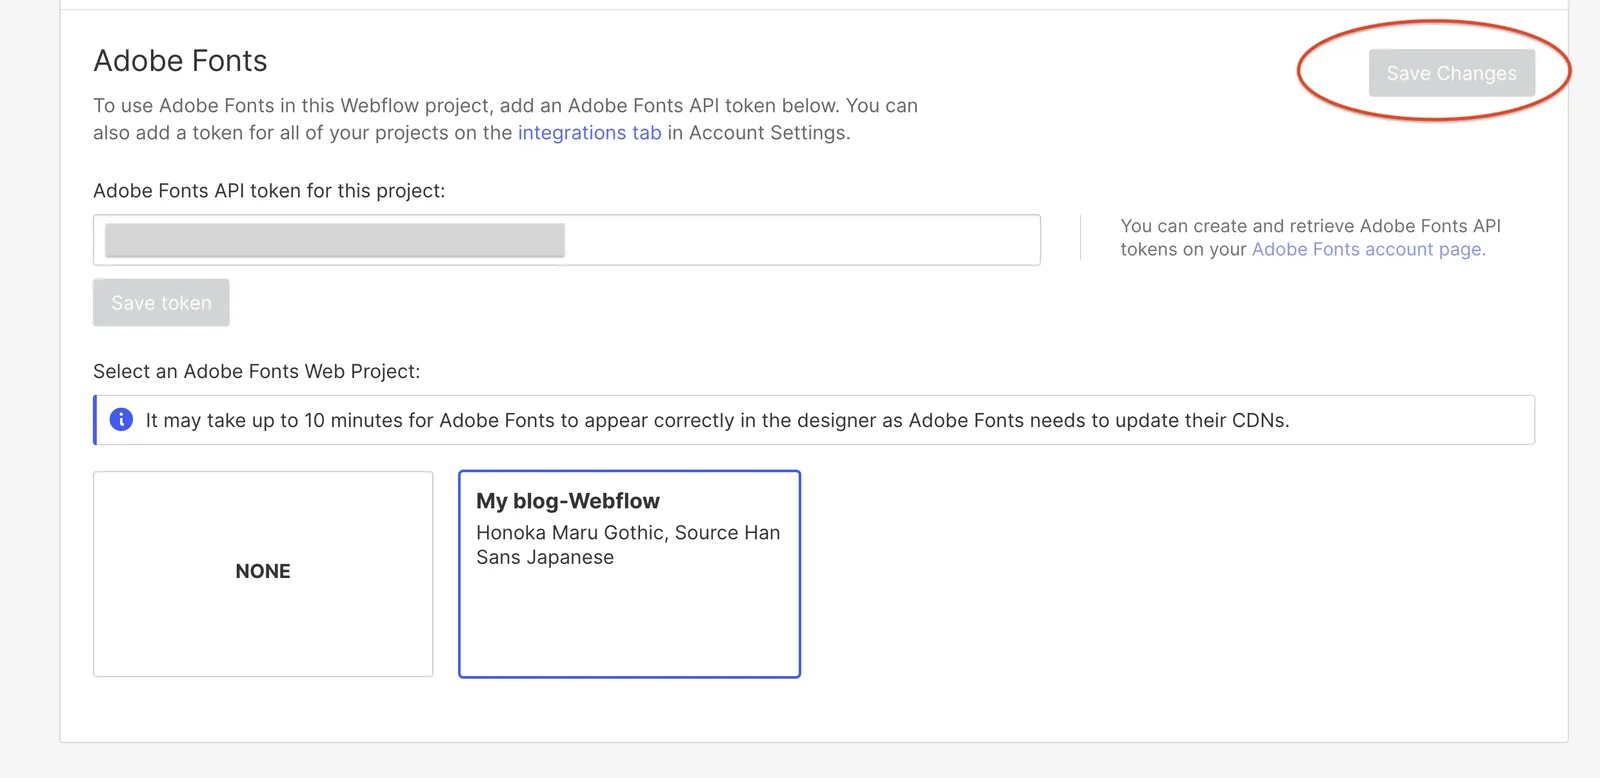
Your file and fonts appear — select and save, and Adobe Fonts are in.
Note: Not showing? Refresh the page.
Note: Nothing applies until saved — don't forget to save!
[Caution] When fonts don't take effect
Propagation can take time — more fonts, more time. On slow connections it can take around 20 minutes; be patient.
Adding custom fonts (compress under 2MB → upload)
Custom fonts must be uploaded as files under 2MB — which usually means compressing them first.
- [Step 1] Download compression tools
- [Step 2] Subset the font
- [Step 3] Convert to WOFF
- [Step 4] Add to Webflow
[Step 1] Download the tools
CJK fonts (with thousands of glyphs) are huge, so subsetting — keeping only the characters you use — is essential. The original walkthrough uses two free Japanese tools (Subset Font Maker and WOFF Converter); any font-subsetting tool for your language works on the same principle.
- Musashi System: Subset Font Maker
- Musashi System: WOFF Converter
- On the command line,
fonttools'pyftsubsetplussfnt2woff-zopflidoes the same job cross-platform
Their Mac builds come in 32-bit and 64-bit versions — since everything from the Intel Core Duo era around 2006 onward is 64-bit, any recent Mac takes the 64-bit build.
[Step 2] Subset the font
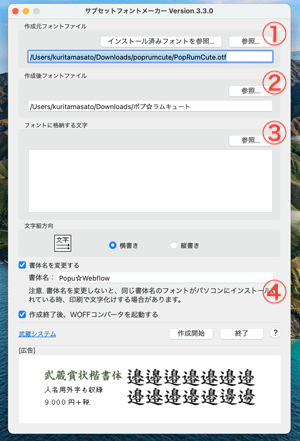
Build a smaller font containing only the characters you need: ① choose the source font ② set the output location ③ paste in your character set — for Japanese, the level-1 kanji plus symbols, romaji and kana list the original walkthrough points to; for Latin text a standard Latin-1 set is plenty (plus any special characters you use) ④ name the file using ASCII only — special characters crash the app.
[Step 3] Convert to WOFF
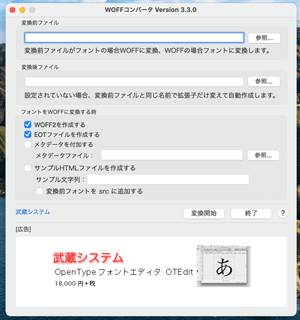
Convert the file to WOFF. WOFF2 is lightest but has narrower platform support — choose per your needs. Tick the WOFF2 checkbox and convert; nothing else in the settings needs changing.
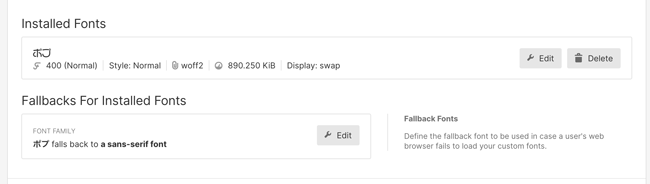
[Step 4] Add to Webflow
Upload the lightweight file. Webflow offers a weight selector, but subset files carry no bold data, so it won't apply — pick the weight you subsetted at and name accordingly. Upload two files at different weights and both become usable.
Summary: Google Fonts first
- Google Fonts: pick from a dropdown, done in a minute
- Adobe Fonts: set the API token once, then just choose fonts
- Custom fonts: uploadable once subsetted — use a subsetting tool and a WOFF converter
Worried web fonts will slow the site? Run it through a page-weight checker.
For everything to stay inside Webflow, web fonts are the best approach. When in doubt, start with Google Fonts — the Noto Sans family is popular and easy to work with.
Frequently asked questions
How many ways are there to add fonts to Webflow?
Three: Google Fonts, Adobe Fonts, and custom fonts. The easiest is Google Fonts — pick from a dropdown and it's added in about a minute.
How do I add Adobe Fonts to Webflow?
Three steps taking about 5 minutes: set the API token, choose your fonts, and save in Webflow. Some Adobe Fonts are free, and the method is identical on paid plans.
Is there a size limit for custom fonts in Webflow?
Yes — files must be under 2MB, which usually requires compression. Subset the font to only the characters you use, then convert to WOFF.
What if an added font doesn't take effect?
Nothing applies until saved, so check that first. Propagation can also take time — up to around 20 minutes on slow connections — so be patient.